

Easy Guide: Installing 3.5 Inch Radius Corner Hinges for Your Doors
Hinges are an integral part of any door, providing the essential functionality of allowing it to swing open and closed. While there are various types of hinges available, one popular choice for residential doors is the 3.5 inch radius corner hinge. These hinges are durable, versatile, and relatively easy to install, making them a preferred option for many homeowners. In this guide, we will walk you through the step-by-step process of installing 3.5 inch radius corner hinges for your doors, ensuring a smooth and secure operation for years to come.
Understanding 3.5 Inch Radius Corner Hinges

Before diving into the installation process, let's take a moment to understand what exactly 3.5 inch radius corner hinges are and why they are a popular choice. These hinges feature a rounded corner with a radius of 3.5 inches, which provides a sleek and modern look to your doors. They are commonly used for interior doors, such as bedroom doors, closet doors, and bathroom doors.
One of the key advantages of 3.5 inch radius corner hinges is their versatility. They can be used with both wood and metal doors, making them suitable for a wide range of applications. Additionally, these hinges are available in various finishes, such as brass, chrome, and nickel, allowing you to choose the one that best complements your door hardware and decor.
Tools and Materials Needed

Before you begin the installation process, it's important to gather all the necessary tools and materials. Here's what you'll need:
Tools:
Electric or cordless screwdriver
Measuring tape
Pencil
Chisel (if installing on a wooden door)
Hammer (if using a chisel)
Utility knife (if needed for cutting or trimming)
Level (optional but recommended for ensuring the door is properly aligned)
Drill (optional, if pre-drilling screw holes)
Materials:
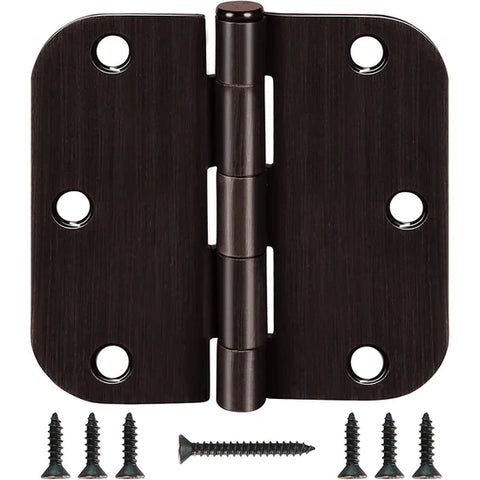
3.5 inch radius corner hinges (make sure you have enough hinges for each door)
Screws (typically included with the hinges, but you may need extras depending on the door material and thickness)
Wood filler (if needed for filling old screw holes)
Sandpaper (if needed for smoothing surfaces)
Paint or finish (if needed for touch-ups or matching existing door finishes)
Screw hole plugs (optional, for covering screw heads for a finished look)
Doorstop or door holder (optional, for holding the door in place while installing hinges)
Safety goggles (recommended for eye protection, especially when using power tools)
Step-by-Step Installation Guide
Now that you have everything you need, let's get started with the installation process:
Step 1: Remove the Old Hinges (if applicable)
If you're replacing existing hinges, start by removing them from the door and the door frame using a screwdriver. Carefully unscrew each hinge from both the door and the frame, ensuring you keep track of the screws. Set aside the old hinges and screws for disposal or reuse if they're still in good condition.
Step 2: Prepare the Door and Frame
Before you begin installing the new hinges, it's essential to prepare both the door and the door frame. Place the door on a stable surface, such as sawhorses or a workbench, with the side that will be facing out when closed facing up. Similarly, if you're installing hinges on a door frame, make sure it is securely in place and properly aligned.
Step 3: Position the Hinges
Using a measuring tape and pencil, mark the desired location for the hinges on both the door and the door frame. For most doors, hinges are typically installed about 7 inches from the top and bottom of the door, with additional hinges spaced evenly between them for support. Use the level to ensure the hinges are aligned properly both vertically and horizontally.
Step 4: Mortise the Hinge Recesses (if applicable)
If you're installing hinges on a wooden door, you may need to mortise the hinge recesses to ensure a flush fit. Use a chisel and hammer to carefully carve out the recesses, following the markings you made in the previous step. Take your time and work slowly to avoid chipping or damaging the wood.
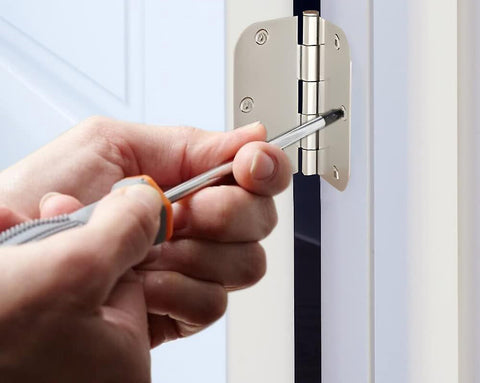
Step 5: Attach the Hinges to the Door
Place the hinges in their respective positions on the door, aligning them with the markings you made earlier. Use a screwdriver to secure the hinges in place using the provided screws. Start by inserting one screw into each hinge and loosely tighten them before inserting the remaining screws. This will help ensure the hinges are aligned properly before final tightening.
Step 6: Attach the Hinges to the Door Frame
Once the hinges are securely attached to the door, hold the door in place against the door frame, making sure it is properly aligned. Attach the hinges to the door frame using the same process as before, ensuring that the door swings freely without any obstructions. Again, start by loosely tightening one screw in each hinge before inserting the remaining screws.
Step 7: Test the Door
After installing the hinges, open and close the door several times to ensure that it operates smoothly and without any issues. Check for any sticking or rubbing against the frame, and make any necessary adjustments if needed. If the door doesn't swing freely, you may need to loosen the screws slightly and reposition the hinges.
Step 8: Repeat for Additional Doors (if applicable)
If you're installing hinges on multiple doors, repeat the same process for each door, ensuring consistent placement and alignment for a uniform look throughout your home. Take your time with each installation to ensure accuracy and proper function of the doors.
Conclusion
Installing 3.5 inch radius corner hinges for your doors is a relatively straightforward process that can be completed with just a few basic tools and materials. By following the step-by-step guide outlined above, you can ensure that your doors operate smoothly and securely for years to come. Whether you're replacing old hinges or installing new ones on freshly hung doors, this easy guide will help you get the job done quickly and efficiently.


